Tuesday, August 29, 2006

Done!

Two days ago, my dog got a new bone and she hasn't been seen or heard from since. (Well, I suppose I can see her as she has been laying next to the couch, but I honestly haven't heard her - it's kind of awesome)

Combine a preoccupied dog with a couple of rainstorms and what do you get? A finished Branching Out scarf, that's what.

Voila! The triumphant cast off.

I tried to take a picture of the finished scarf on an armchair. Alas, Maddie has a Pavlovian response to the camera. She has been conditioned to think that enduring flashbulbs in her eyes means she gets cookies.


(It is my own fault due to the amount of bribery that went into taking this picture of her last Christmas)

Since she was kind enough to set aside her bone for a minute, who was I to deny her the opportunity to pose? It really is all about her, after all.

Okay, back to knitting... I am planning to block the scarf over the weekend. I am hoping that by Saturday my desire to see how long it will be when blocked will outweigh my general terror at the thought of dunking it in water. Fingers crossed.

Thursday, August 24, 2006

Recycled card idea

So, this totally pales in comparison to Emily's invitation making skills, but my friend Sean sent me a card the other day that I thought I'd mention.

A little back story... Sean is awesome. He is an amazing graphic artist and designed several of the items for sale at craftfetish. Very creative guy. Since he lives out of state, Emily had the excellent idea of sending him a gorilla-gram for his 30th birthday.

This is the thank-you note he sent.


He also enclosed a photo of him and the gorilla. The gorilla apparently brings a balloon bouquet to the humiliatee er, I mean, birthday boy. So the embellishment is from one of the gorilla's balloons. I will spare Sean the added humiliation of posting said photo on the internet, but it gives context to the card.

I would also like to point out the pretty patterned paper below the balloon. I'm nosy enough that I peeled it up a bit to see if I could figure out where he got it. Turns out, it's a Dutch Boy paint sample.

So gold star to Sean for scamming free craft supplies from the hardware store and making a really cute card out of recycled materials. I may rip off this idea for the C4 swap (note: only a week left to sign up).


I'll try to have some projects of my own to report on next week. I'm currently 25 pattern repeats into my Branching Out scarf. I'm trying to finish in time for my mom's birthday next month and am currently debating just how many pattern repeats I need before I think it is "done."

I'm link-happy today. And so, I'll leave you with this completely random link that made me giggle this morning.

Wednesday, August 23, 2006

Let the Baby Showers Begin!

I am the unofficial Official Shower Hostess...and after 12 bridal showers...it's time to start up the baby showers! So here goes my first one...

We sent the invitations...


I "borrowed" the idea from Stampin' Up. The ladies at my scrapbooking store call it "scrap-lifting". (note I DID BUY the stamp set so it's not completely immoral) They used flowers instead of carriages for a garden party.

The outer card is half a sheet of 12x12 so you get two pockets per sheet. You fold up the bottom to fit the inner card of your liking. Remember to use 2-sided paper because of the fold. This would also be a cool design for a menu card holder at a place setting, or a gift card/ certificate holder.


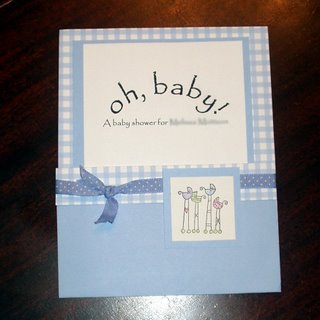
I put the map and registry cards in the little pocket as well.

Cutting the ribbon is A PAIN!!!! The trick is to lay down the ribbon with a little over hang to fold over. Then pinch the ribbon for the knot, then cut it. Glue down the undersides (under the gingham fold) and then tie your knot. I tried to guess where off-center was and it was a disaster.

We made these assembly line fashion and made 30 in three hours. We lost some time by running out of tape runner and so you might be quicker.

After the shower I'll send party photos so you can see where else my gingham and carriages reappear!

Wednesday, August 16, 2006

Co-op Crap Craft Card

So....I was inspired by Sarah with an H's recycled "found items" scrapbooking page and Sara without an H's knitting exchange....

How about a card exchange? I am calling it the Co-op Crap Craft Card or C4 for short.

How it works:

1. Go through your carefully hoarded craftstash.

2. Select some fun items that could be used to make a card, preferably two. The recipient of your "crap" returns a card to you and then hopefully has a second one to send. C'mon...you know you have cute stuff that needs a fresh eye, or extras you can't waste!

3. Leave a comment to this blog that you want to be in the Co-op, leave your name and address. The next commenter in line sends to you, etc. I will be the first comment, so next sends to me. I will mail to the last commenter. The C4 chain will work!!!!

4. When you leave your address, "claim your person". Once you affirm you are mailing to your person I will delete the address so it's not living in cyberland.

5. Don't sign up if you don't want to play. I WILL shame you in blogland! I'm the only idiot who ever mails her recipes and dollars and panties!

Yay! Fun! Mail!


edited to add: If you aren't comfortable posting your snail mail address but still want to play, leave an email address. Your partner can contact you via email to get your mailing address. We'll leave sign-up open until August 31st.

Learning the hard way

Before I started my Branching Out scarf, I read up on the experiences of others who had tried the pattern at the Knitty Coffeeshop. I was going to heed their advice, learn from their mistakes and conquer my first lace project.

Nope. Turns out, I needed to make my own mistakes.

My scarf was going along swimmingly. It was fun to knit and I made it through 13 pattern repeats without incident. It was so trouble free, I neglected to weave in a "lifeline" between my pattern repeats. Lifelines? We don't need no stinking lifelines.

That was dumb. I completely screwed up the 14th repeat.

I tried to tink back a row (tink: verb to un-knit, one stitch at a time. see also: royal pain). Tinking lace is not as simple as tinking garter stitch - the knit three togethers and yarn overs come back to bite you in the butt. I had a tough time getting the right number of stitches back on my needles.

Then I figure out I have screwed up more than one row and I now have an incorrect number of sad, twisted misshapen stitches on my needles. So I decide to just go for it and frog back to where things made sense (frog: verb to recklessly take your stitches off the needles and rip out row upon row of your hard work. origins: someone thought associating this process with the cutesy "rip it ribbit" noise would make this less devastating, they were wrong).

It took me close to a week to gather the courage to do this and close to two hours to get myself back to a logical place in the pattern. I'm back on track now, but have learned my lesson.

See that pretty pink ribbon?


I will not be skipping the lifeline anymore. If I screw up now, I can just pull things back to my pretty pink ribbon and start again with all of the correct stitches in all of the correct places on line 1 of the pattern. So much better than last night's adventure.

Thursday, August 10, 2006

Grilled Goodness

On Wednesday nights, my friend Peggy and I take my dog for a walk and then cook dinner together.

Due to the aforementioned walks, we are usually pretty hungry and none of the food seems to stick around long enough to pose for pictures - so you'll have to take my word for it.

And as it is Wednesday, we don't stand on ceremony and tend to invent recipes based on whatever is living in my pantry.

A couple of recent successes:

Peggy is part of a CSA project and gets a bunch of veggies each week. We never know what she's getting, but it is always fresh and wonderful. I am not fancy enough to keep sea salt in the house and actually ran out of Morton's (pathetic, I know). Turns out that margarita salt is perfect for seasoning veggies for the grill. Tomatoes and peppers and zucchini and squash have all been fantastic. We mostly stick to salt, pepper and olive oil, but a splash of tequila can't hurt. (Just you know, splash away from the fire)

So the moral of this story is - go make friends with someone in a CSA. Or, you could sign-up for one yourself. A great way to get amazing produce and support local farmers without having to wake up on Saturday mornings to go to the farmer's market. (Although sometimes it is worth getting up for the cheese samples)


Another (more recipe-based) success was our Apricot Salmon. Emily has made really great grilled salmon with an orange marmalade-based glaze, but I don't have orange marmalade in my house. But I did have a jar of low-sugar apricot jam, so I thought I would use that. (I know it's not the same thing at all, but go with me here)

Apricot Salmon

as usual, all measurements are approximate

2 Tbsp low-sugar apricot jam
1 tsp soy sauce
2-3 cloves minced garlic (or, if you get it out of a jar like me, about a tsp)
1/2 tsp ground ginger

Shmoosh all of the above together in a small bowl. Adjust the proportions to taste, but try to keep it thick enough to stick to the fish.

Spread across a 1lb salmon filet (or steaks would work - whatever is on sale). Wrap the salmon in foil and grill for 8-10 minutes or until flaky and good. I think this would work out to be more of a glaze if you put it on salmon steaks and cooked them directly over the fire. You get a little less caramelization in the packet, but then I don't have to stress about flipping a 1lb salmon filet. It's all about trade offs.

Anyway, this made a very nice dinner with a little rice and some broccoli. A "make-do" recipe that I would make again.

Tuesday, August 08, 2006

Relief, well, kinda...

Since the weather finally cooled off a bit this weekend (who would have thought I would start to consider 92 degrees cool?) I decided to venture outside with the little dog. Maddie was in serious need of a decent walk. As a result, not much craftiness to report from the weekend.

I did get two more layouts finished for her puppy scrapbook. Sorry about the photo quality - I'm still working on my "taking pictures of pictures" skills.

I am a new scrapbooker and currently only working on a book about my dog. As such, I am incredibly cheap about buying all of the fancy papers and embellishments and stuff. Some day, I'll have nieces and nephews to make scrapbooks for and will need to take out a second mortgage to cover my supplies, but until then I enjoy the challenge of scrapbooking with whatever I find lying around the house.

A couple of years ago, I was briefly obsessed with glass etching and bought some brush script stencils. I used those to make a hand cut title for this page of Maddie playing with her little friends.

The title and mattes were actually cut out of an envelope that went with a card I had messed up. The messed up card actually became the title and mattes for another page I made a while back. Since they are on facing pages, I thought the continuity of colors was nice. (The photos don't show this well, but the two pages match, I swear)

The other page I made this weekend was of Maddie and her cousin Georgia playing at the beach over the 4th of July weekend. They spent hours tearing up and down the sand and around a little row boat. Maddie barked her head off trying to get Georgia to slow down because her little legs couldn't keep up. Awesome, I love a tired dog.

As for the scrapbooking, I have seen a lot of cool layouts on scrapjazz incorporating circles. Due to the aforementioned cheapness, I don't have a circle cutter. But I do have some dinner plates and salad plates and even a coffee can. Voila! Circles. It would have been nice to have more size options, but I think it came out pretty cute for a "make-do" technique.

That's it for now. My Branching Out scarf is about 40% completed and my basket weave afghan is about 25% done. I have about three more partially completed scrapbook pages littered across my desk. It's too hot to bake, but I unwrap a mean popsicle. More craftiness soon.

Tuesday, August 01, 2006

Freezer Paper Triceratops

So I had this purple t-shirt that I never wore. Seemed like as good a time as any to jump on the freezer paper stencil bandwagon.

Because everyone's favorite herbivorous dinosaur is just the thing to brighten up your forgotten fashions, I downloaded some black and white triceratops images from Microsoft clip art.

(And don't even tell me that the brontosaurus is your favorite herbivorous dinosaur, because they aren't brontosauruses any more, they are apatosauruses and that still doesn't sound like Sarah. so there.)

If you aren't familiar with freezer paper stencils, check out craftster or the handy tutorial from angry chicken. Basically, freezer paper (not to be confused with wax paper, but the handy stuff on the next shelf with a paper side and a plastic-y side) can be stuck to fabric using a hot, dry iron. Cut a fancy hole in the middle before you stick it down and voila - stencil!

Which brings us back to my triceratops. I printed it out and transferred the image to the freezer paper. If you don't have carbon paper (which I never do), you can fake it by shading all over the back of the image in pencil. Fill it in pretty heavily so that all of the edges are covered. Flip your scribbles over so that you see the nice image side and position it on your freezer paper. Now if you press firmly as you trace the design, the picture will transfer onto the freezer paper. Not perfect, but you get a clear enough outline so that you can cut out your stencil.


An exacto knife would be ideal for a project like this, but I tend to just use scissors. If your stencil isn't too finicky, they work fine.

Once your stencil is cut out, you can position it on your shirt or whatever else you have decided to paint. Press it with a hot, dry iron and it will adhere to the fabric. Since freezer paper is cheap and I had a giant roll, I took angry chicken's suggestion and ironed a second piece of paper to the inside of the shirt so that the paint couldn't bleed through.

Dab on the fabric paint of your choice. I used Tulip Soft brush-on fabric paint because it was the cheapest kind that wasn't "dimensional" at the store. ("Dimensional" aka the "Puffy Paint" we used to decorate shirts with at birthday parties in middle school. blech)


Let it dry and start fishing for compliments on your fabulous new dinosaur shirt. (If dinosaurs aren't your thing, there is a flikr group devoted to freezer paper stencils where you can get inspiration. Check it out here)